

Four Easy Steps
1.1 Get in Touch
Contact ProPicFix and let us know your shooting schedule. Include the type of property, the expected day of the photo shoot, and any questions you have about our services. We’ll quickly reply with a personalized upload link for your photos.
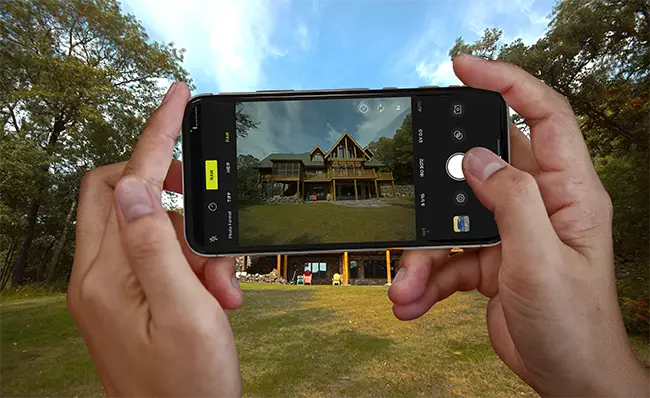
1.2 Capture Your Photos
Take your photos using our recommended technique:
- Download a rapid-burst exposure-bracketing app on your smartphone (easy tutorials are available on our website).
- Follow our professional real estate photography tips and composition guides for the best results.
1.3 Select and Upload Your Images
Review your photos and choose the best sets you want professionally edited. Using the upload link we provided, you can:
- Upload directly from your mobile device, or
- Upload from a folder on your desktop or laptop.
1.4 Receive Your Edited Photos
Once processing is complete, you’ll receive an email with a secure download link. You’ll get both:
- Full-size, high-resolution print versions
- Web-optimized versions (perfect for online listings)
- Payment: We accept Credit Card, PayPal, and Venmo for quick and easy payment.
Smartphone Camera Setup
2.1 What is HDR Photography
HDR processing captures multiple exposures of the exact same scene, then intelligently merges them by selecting the best parts of each image. This technique preserves rich detail in both bright highlights and deep shadows—even in challenging lighting conditions. HDR is the only way to capture clear window views plus a bright interior all in one shot.
The result? Bright, crisp interiors paired with vibrant, perfectly exposed views through the windows—the hallmark of high-end real estate photography.

The same composition taken at different exposure levels.
2.2 Smartphone Camera Technology
Capturing the multiple exposures needed for real HDR requires rapid-burst exposure bracketing. This feature is standard on professional DSLR cameras, but it’s still not built into most smartphones. However, there are simple bracketing apps availible to add this function. HDR ready photos can be taken from your own smartphone.
Many smartphones offer a built-in “HDR” mode, but this is only a software simulation—not true HDR merging. These single-shot approximations cannot deliver the professional results that real estate photography demands.
Smartphone Apps for HDR Capabilities:
Moment Pro Camera (iOS)
ProCamera (iOS)
Open Camera (Android)
ProShot (Android)
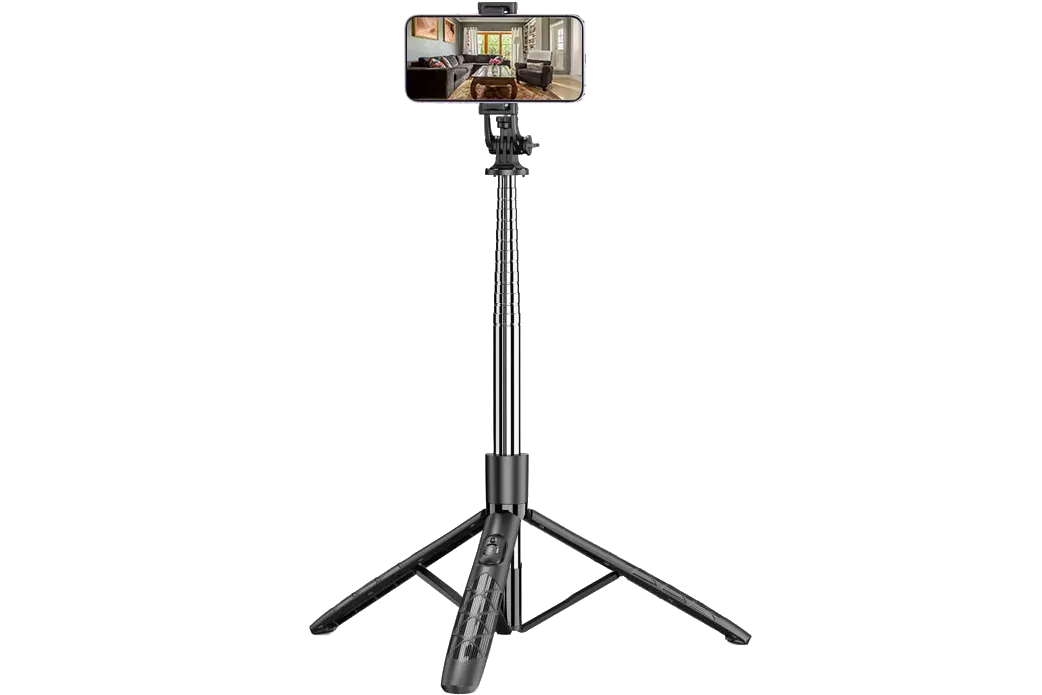
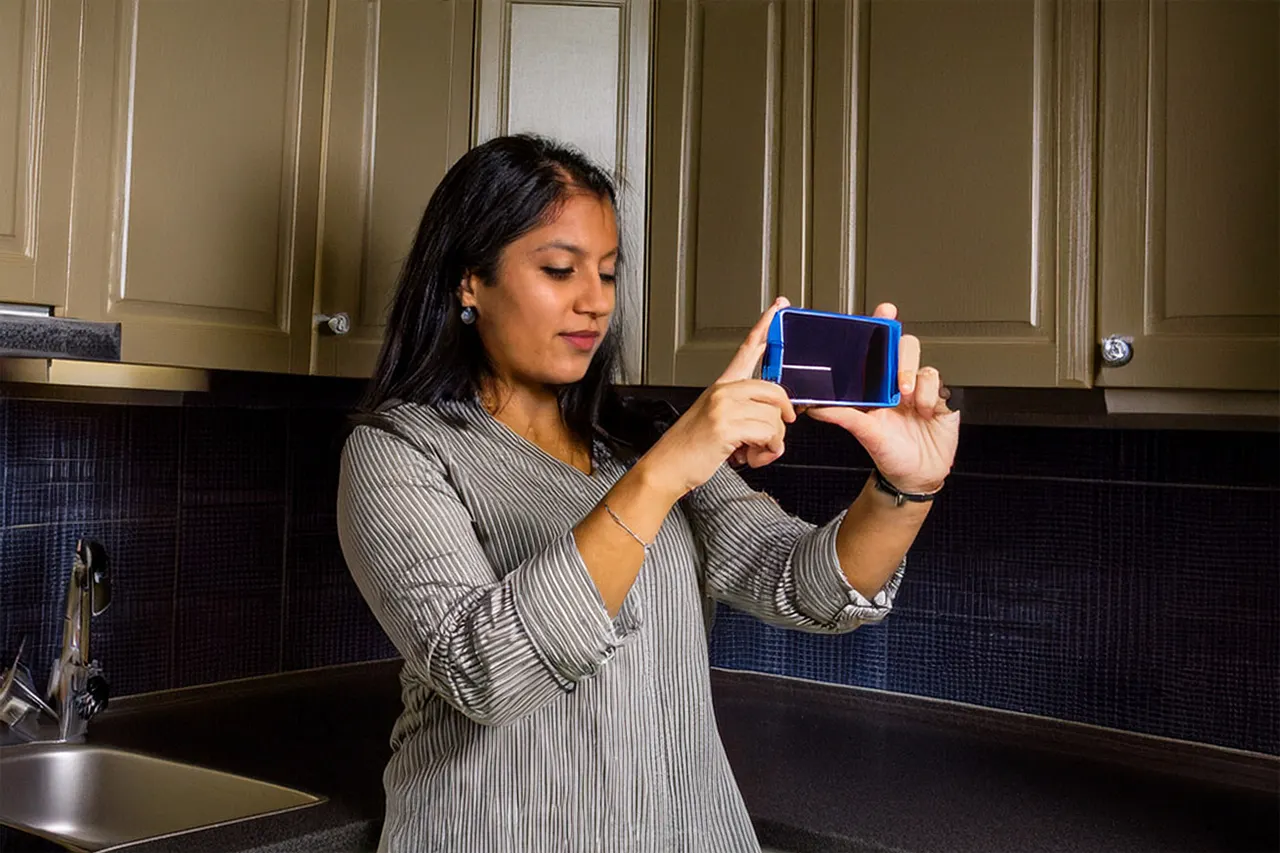
2.3 Tripod Use Recommended
An optional but very worthwhile investment is a smartphone tripod. For $25 or less, you’ll find plenty of excellent options that greatly enhance your real estate photography ability.
A tripod helps you stabilize your phone, keep it perfectly level, and shoot consistently at the ideal height. This results in sharper, more professional-looking images with straight lines and better composition—especially important when capturing multiple exposures for HDR merging.
Property Preparation
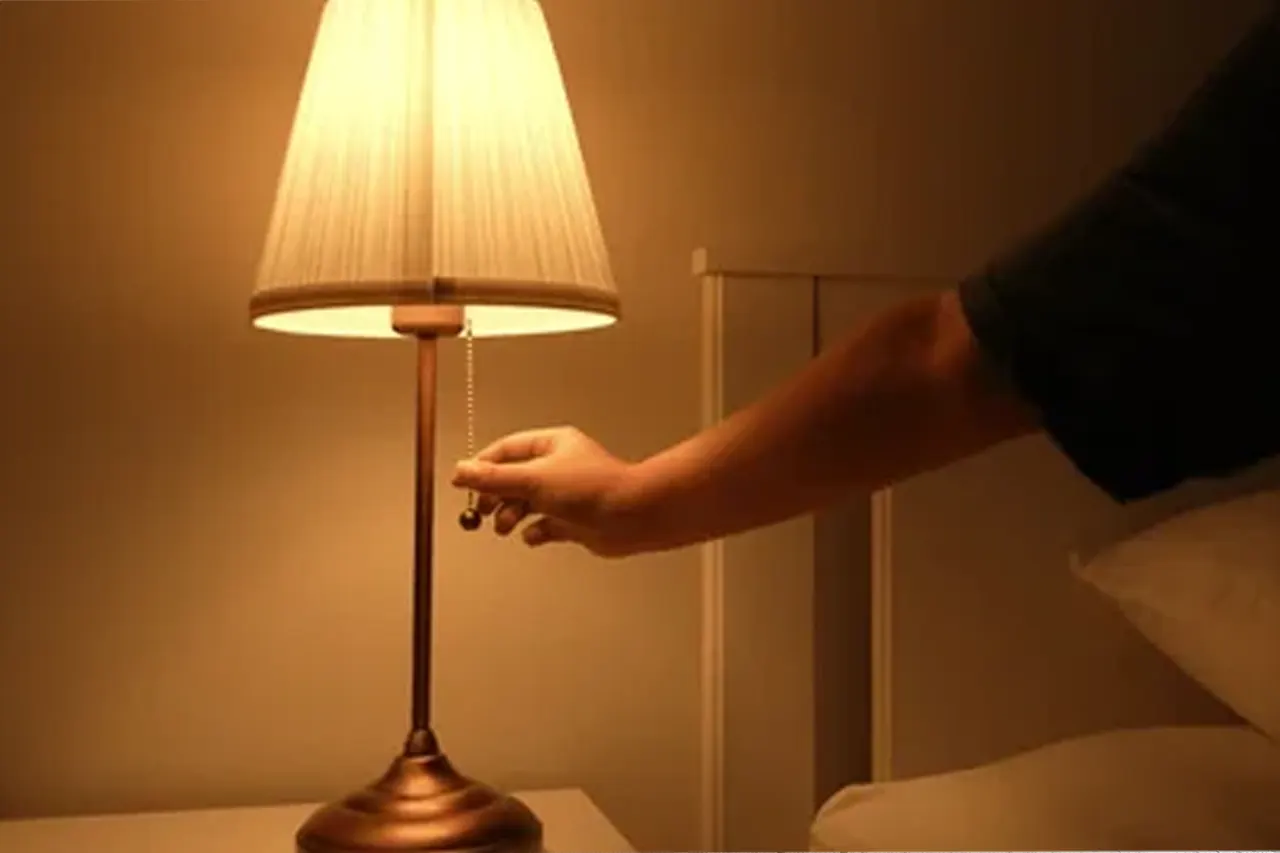
3.1 Interior Lighting
For the best results, photograph interiors during bright daylight hours while avoiding direct shots into the sun. Open all curtains and blinds to allow maximum natural light. Turn on all interior lights, including lamps, decorative lighting, and gas fireplaces, to create a bright, welcoming atmosphere.
- All Lights On
- Avoid Direct Sun
- Curtains/Shades Open

Dome lights, lamps, and gas fireplace all on. Curtains and shades open.
Turn on all overhead lighting fixtures, open curtains.
Switch on all lamps and lighting fixtures.
3.2 Interior Staging
A clean, decluttered space is essential. Remove personal items, wall clutter, excess furniture, and any visual distractions to make rooms feel larger and more spacious. Most of the surroundings that make a house a home - are also bad for the listing. Potential buyers/renters are not interested in your stuff. People would rather see a blank slate they can make their home.
- Minimal Wall Display
- Make all beds
- Clear all tables, counters, sink areas
- Always close toilet lids
Note: While most staging involves removal, strategic additions can also enhance appeal. Items like fresh flowers, neatly arranged table settings, and fluffed and styled pillows.

Clean side of oven, clean sink area, remove all items from refrigerator.
Elegant but minimal table setting to enhance photos.

Remove clutter, remove unattached shelving and personal items.
3.3 Exterior Lighting
A bright and sunny day make for a great backdrop. However, heavy shadows on the front of the house are to be avoided. Therefore, looking at the front of the house you want the sun at your back. Medium overcast days can eliminate shadowing issues. Blue sky can be added in post-editing. If you wish to get a dusk shot - there is only a 10-15 minute window after sunset to get your photos. All interior and exterior lights should be on.
- Sunny Day to Overcast
- Avoid Heavy Shadows
- All Lights On for Dusk Shots

Avoid photos while front of house is under dark shadows.

Blue sky conditions are always best for outdoor photography.
For dusk images timing correctly is extremely important.
3.4 Exterior Staging
A clean and well organized property is of most importance. Move cars, trash bins, and garden hoses from the scene. Stage patio furniture in an organized fashion. A well kept lawn - mowing and landscaping - are always ideal shortly before photographing a property.
- Remove Overgrowth
- Freshly Mowed Lawn
- Move Vehicles, Garden Hose, Etc
- Straighten Lawn Furniture

Always take photos with a freshly cut lawn.
Move all vehicles or trailers away from house.
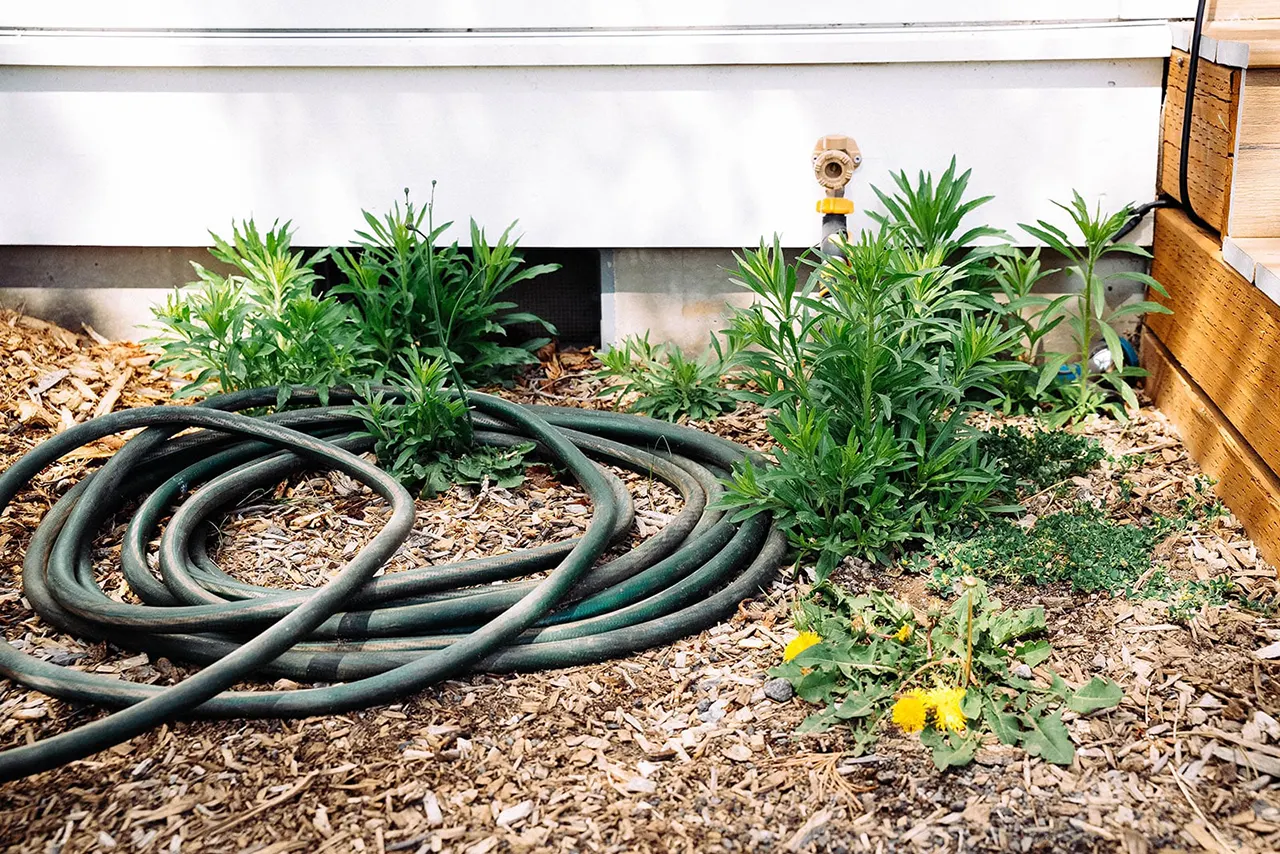
Put away garden hose, rakes, garbage cans, etc.
Composition Basics
4.1 Height and Aim
For interior photography the height of your camera should always be around 4.5ft to 5ft. This is the approximate center height of most rooms and will equally capture the floor and ceiling. Maintain this height even for rooms with high ceilings. Aim should always be perfectly level. Always turn off the smartphone flash. It is highly recommended to use a tripod to maintain both height and level aim.
- 4.5ft to 5ft Camera Height
- Aim Perfectly Level
- Tripod Highly Recommended
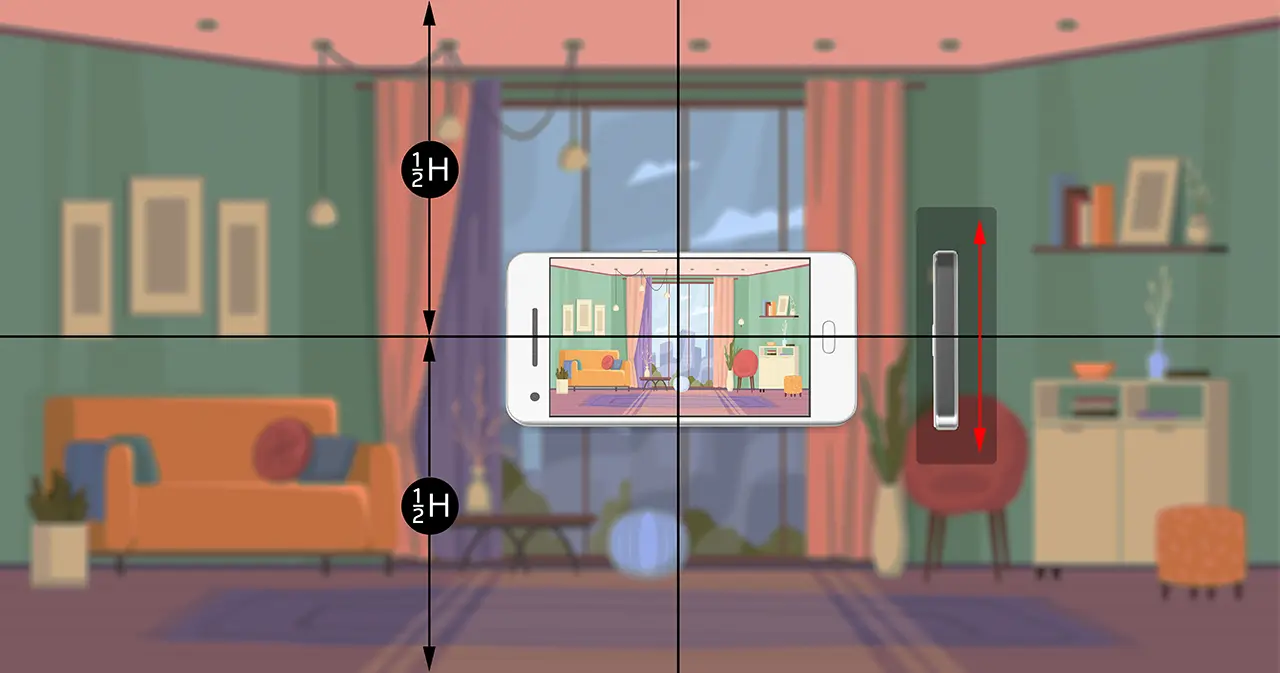
Always aim level at about 4.5ft to 5ft height.
Aim level and slightly above cabinet bottoms.
Composition should include even amount of floor and ceiling.
4.2 Three Wall Rule
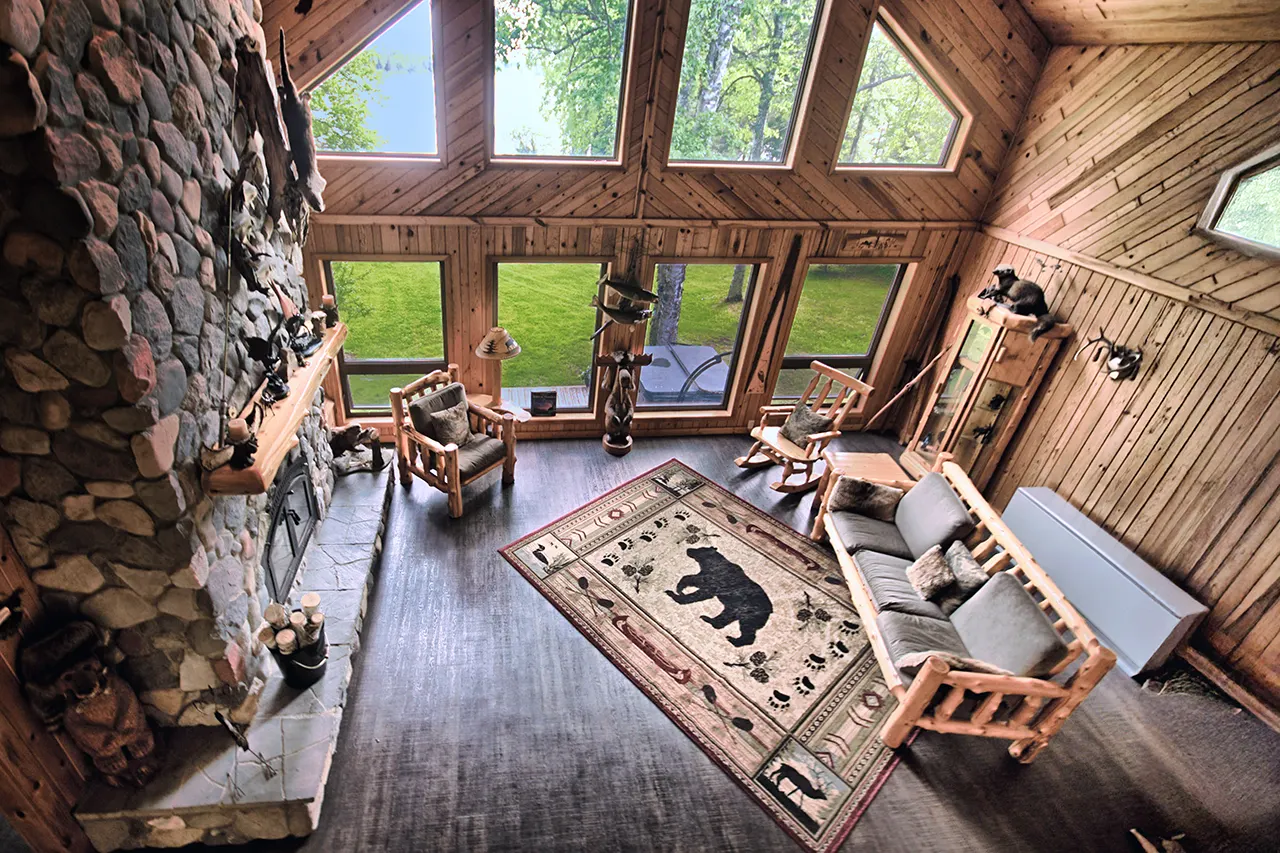
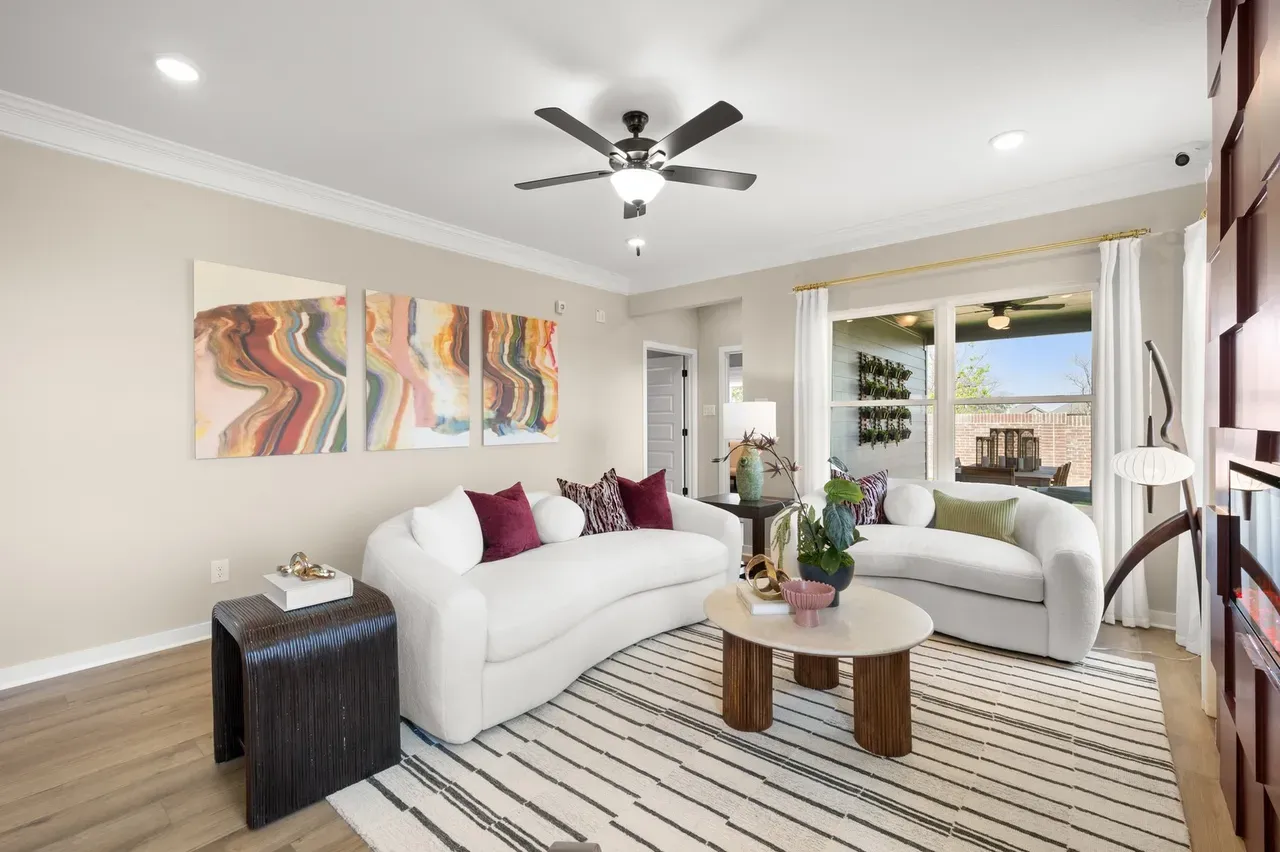
If at all possible, each shot should include a portion of three-walls. This basic technique adds dimensional perspective. The resulting image will have depth and space giving a larger feel to the area compared to a narrow composition. Back up far enough - at minimum - to include a sliver of the third wall. This technique alone will significantly improve the interior photos of your property.
- Adds Dimensional Perspective
- Significant Image Improvement
- Space Feel Larger

The short wall with the desk adds dimensional perspective to the image.
Composition includes just enough of the forward wall to give proper perspective.
Adding a sliver of both side walls to this kitchen photo demonstrates size.
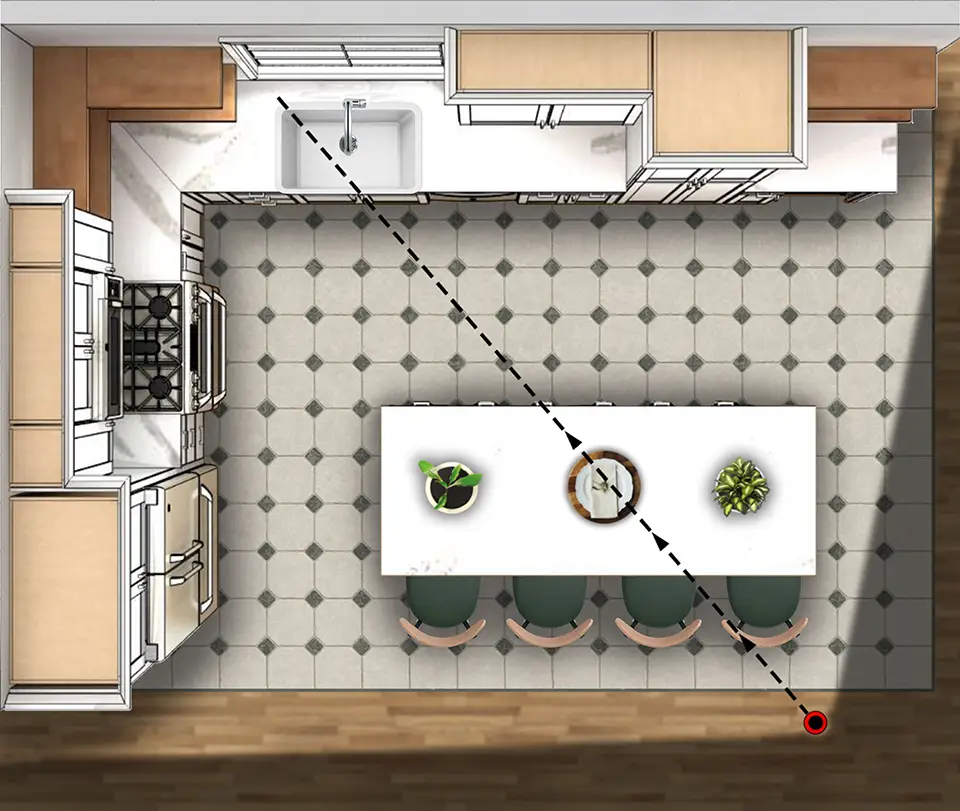
4.3 Corner to Corner
The most effective and desirable angle is shooting from one corner of the room toward the opposite corner. Do not strictly position the camera in the corner, but try to aim down the natural walking path. This adds an inviting “welcome into the space” feel. Avoid showing the back of furniture. Always include as many windows as possible in every shot.
- Aim Down Walking Path
- Include Maximum Number of Windows
- Avoid Couch or Chair Backs
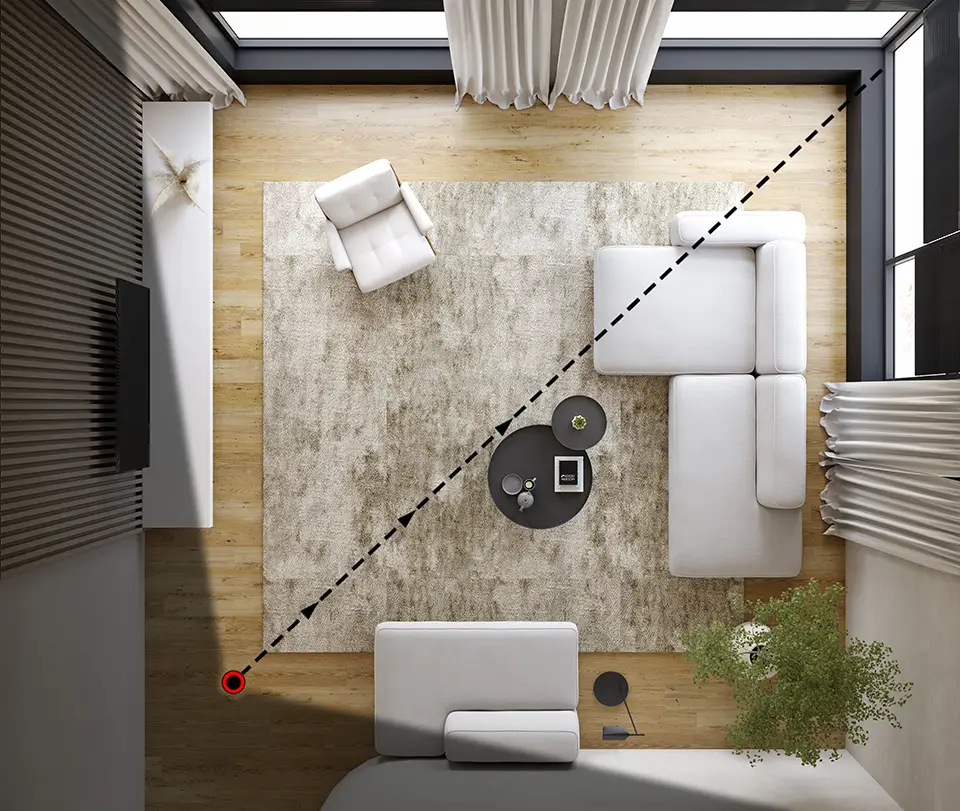
Example of aiming corner-to-corner down the walking path and capturing maximum windows.
Aiming into the corner of a kitchen offers a great composition.

Centering the bed while aiming into a bedroom corner.
4.4 Straight-On Wall
Straight-on is when aiming exactly perpendicular to a wall. Ideally centered on a wall - but shifting may be required if the subject is not centered. This view is achieved by moving back far enough to include a portion of both adjacent walls. This technique frames the image while following the three-wall rule, showcasing the size and layout of an indoor space.
- Exactly Perpendicular to Wall
- Include Two Adjacent Walls
- Offset Subject can be Centered

Aim perpendicular to wall and staircase while capturing two adjacent walls.
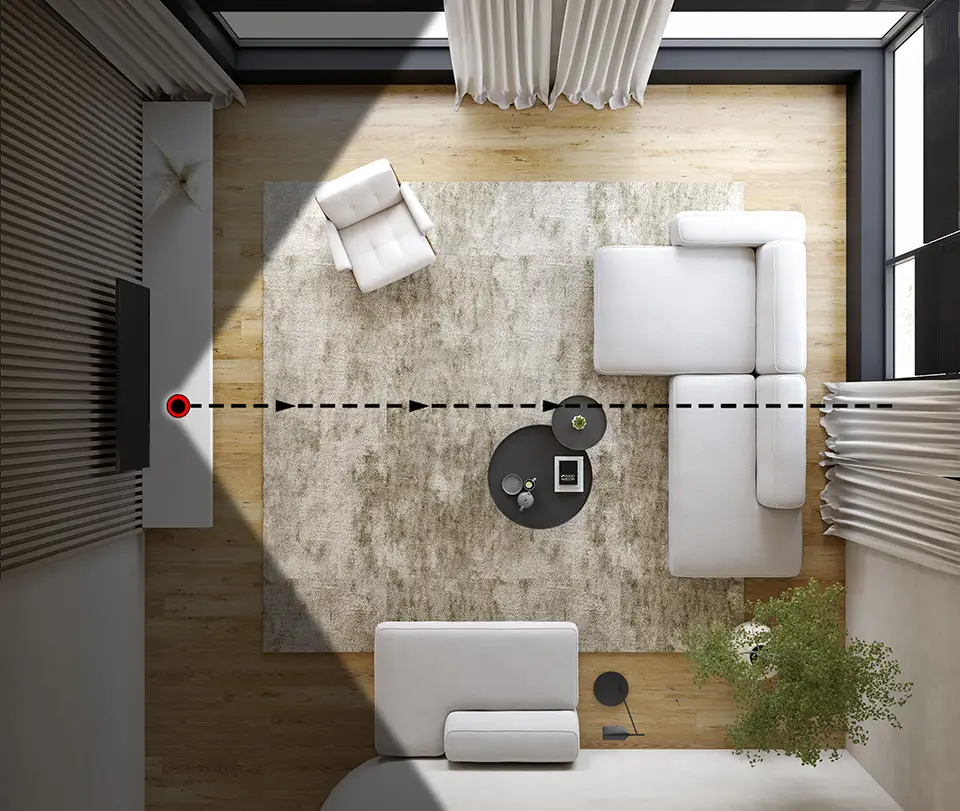
Example of capturing family room using straight-on technique..
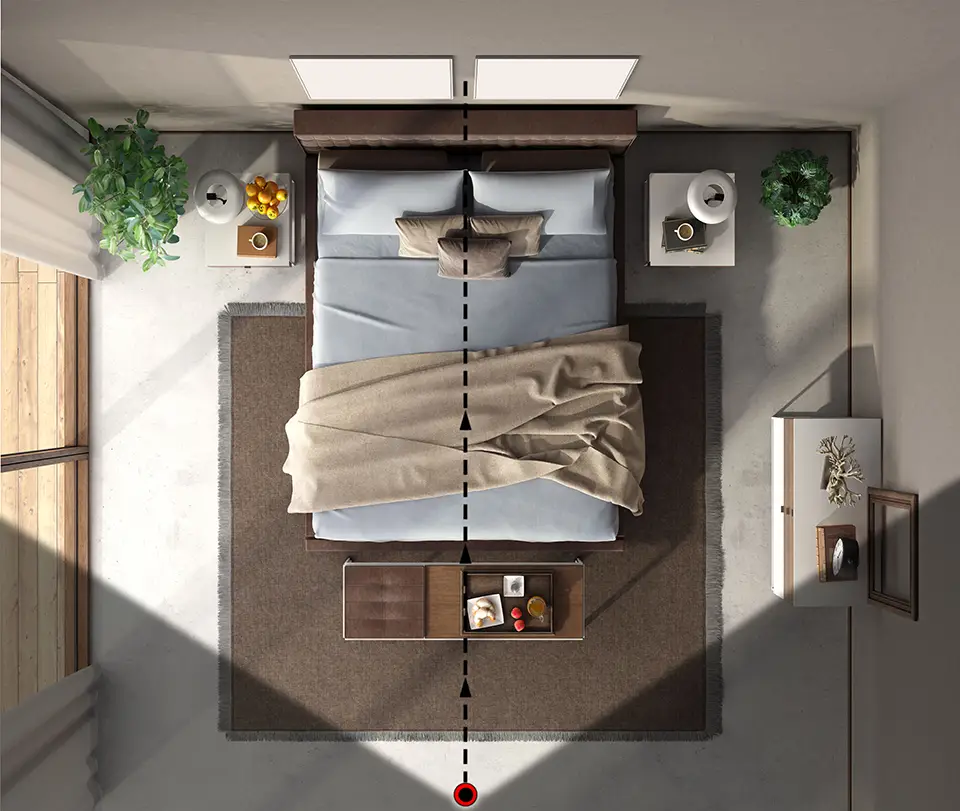
Straight-on technique in bedroom, centering the bed as the room focus.
4.5 Split View Composition
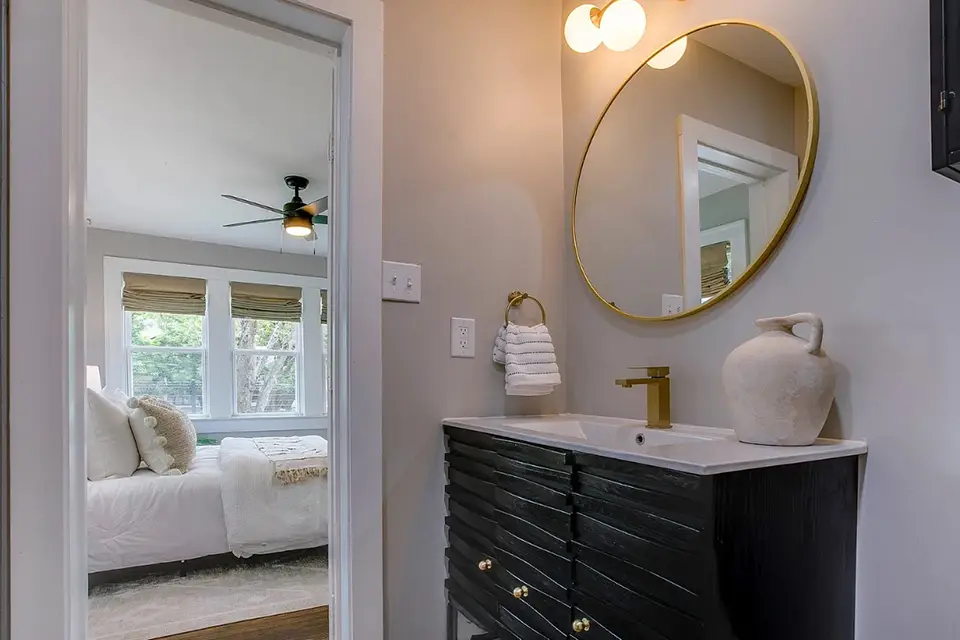
Narrow spaces (bathrooms, hallways, foyers, mudrooms, stairways, and closets) are often the hardest to photograph. Rule #1: Never switch to portrait (vertical) orientation — it will make the space look smaller. One great option is the split-view technique: Find an angle that captures the narrow subject room plus an additional space, side-by-side. Two areas combined creating one wide-angle view. The additional space can be a hallway, closet, or larger room. (i.e. master bathroom on the right half with inner view of master bedroom on the left).

Split-view used to capture master bathroom vanity and orientation of bedroom.

Capture part of hallway to finish off bathroom view image.

Wide shot created by combining narrow foyer area with adjacent hallway.
4.6 Special Features
Balcony or stairway views are rare exceptions where you may point the camera slightly downward. Similarly, skylight features may require a slight angle upward. Smaller key feature close-ups are the only time with interior photography it may be advantageous to switch your camera setting from wide-angle mode back to standard mode. Specifically, this technique can be used for close-up focus on fireplaces, farmhouse sinks, barn doors, high-end appliances, or custom fixtures. These are the only interior shots where 1x standard zoom can be used instead of 0.5x wide-angle.
Great Room looking down over balcony.
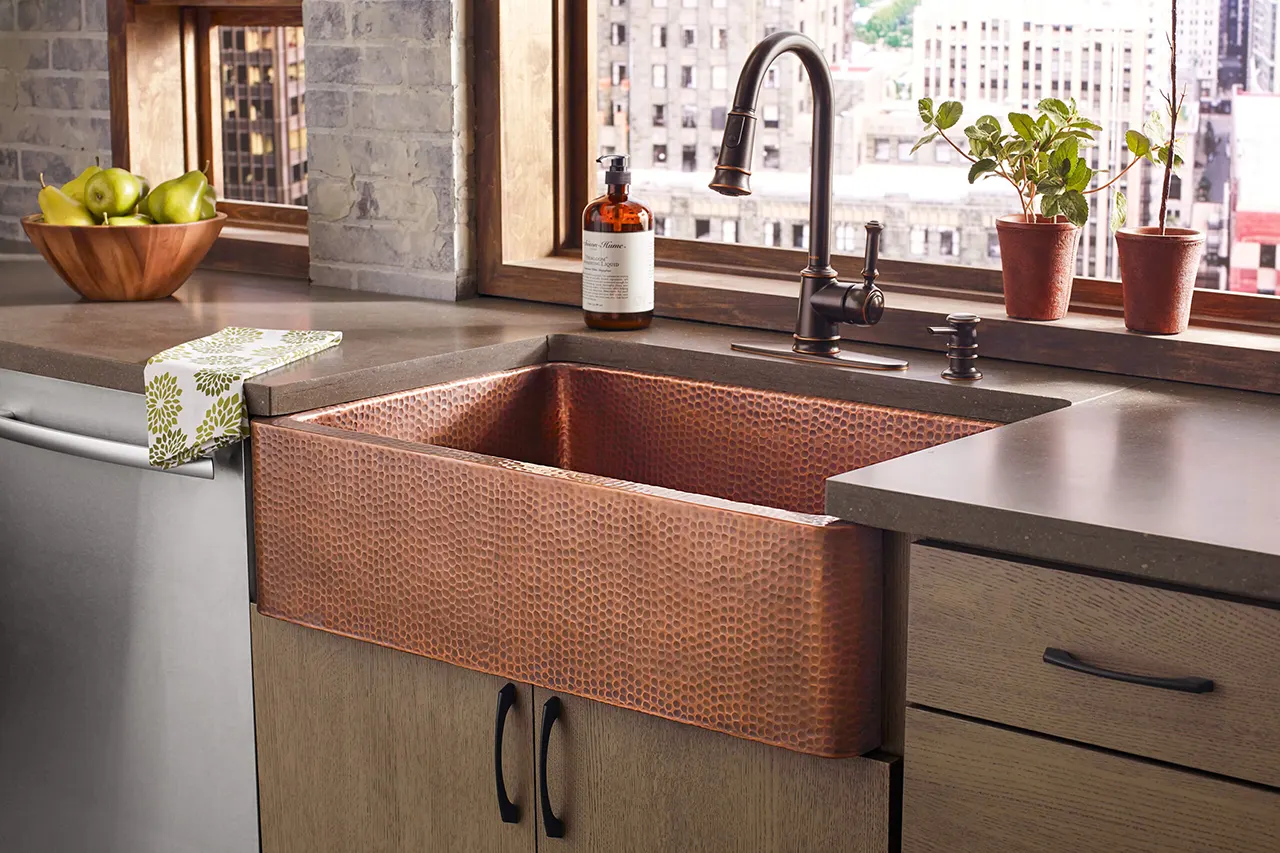
Close view of farmhouse sink using 1x zoom.
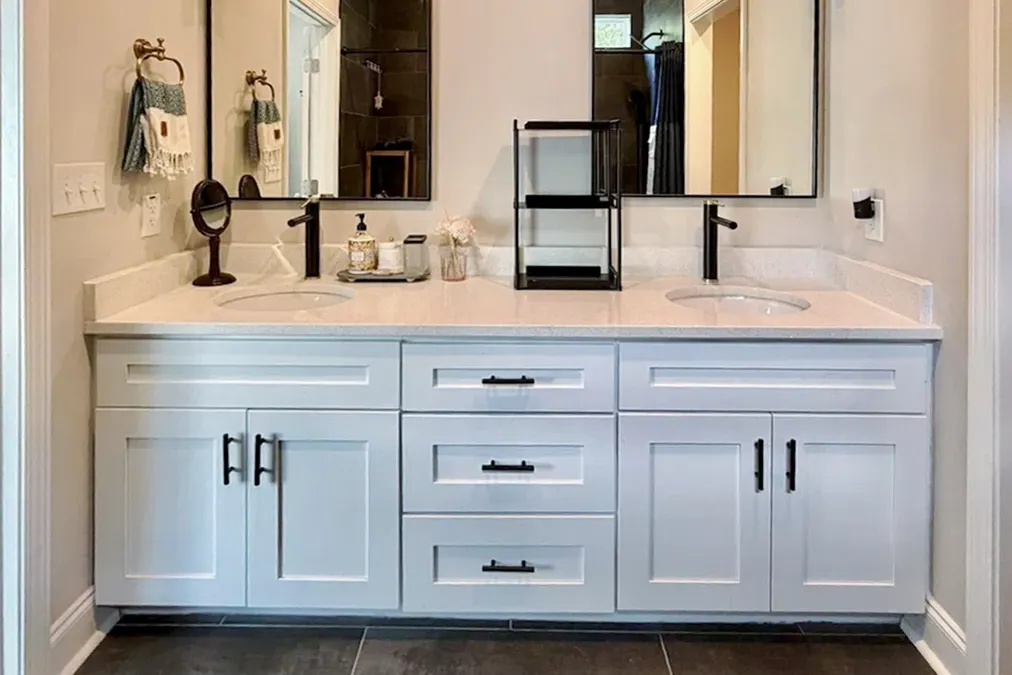
Double-vanity feature taken with 1x zoom.
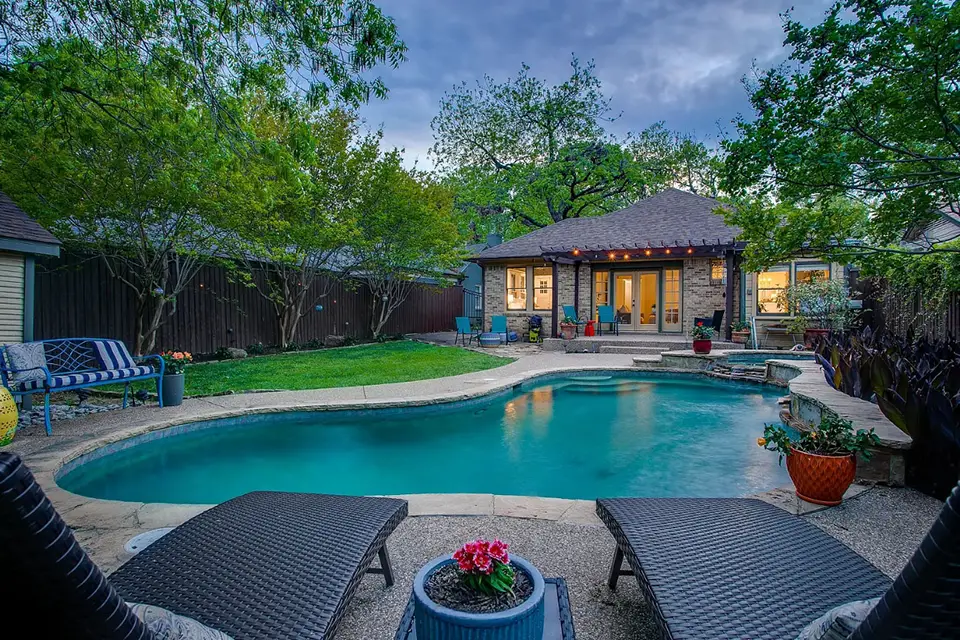
4.7 Exterior Tips
Balcony or stairway views are rare exceptions where you may point the camera slightly downward. Similarly, skyBest persepectives can vary greatly from property to property. Generally, shooting from multiple corners of the property will highlight depth and size. 45° angle views of the structures are often great views as well. Always try to get one marquee "hero" shot, a straight-on view of the front of the house (Eye level or above). This would typically be the primary photo used on all listing sites.
Take many outdoor photos and chose the best later - highlighting both the structures and the views - from several different perspectives. It is better to delete unwanted images than wish you had taken more.
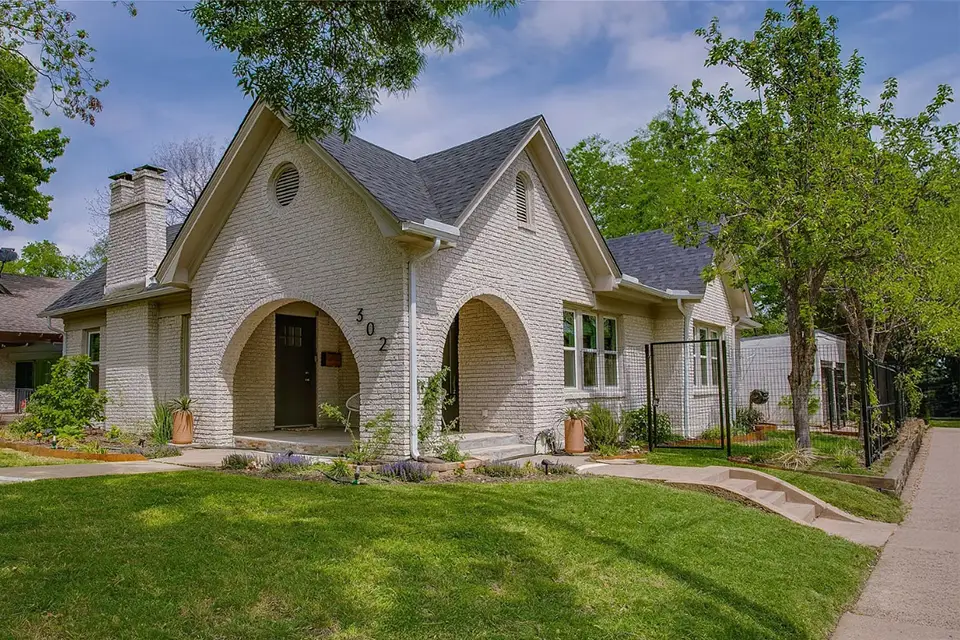
Corner view of property featuring front entrance.
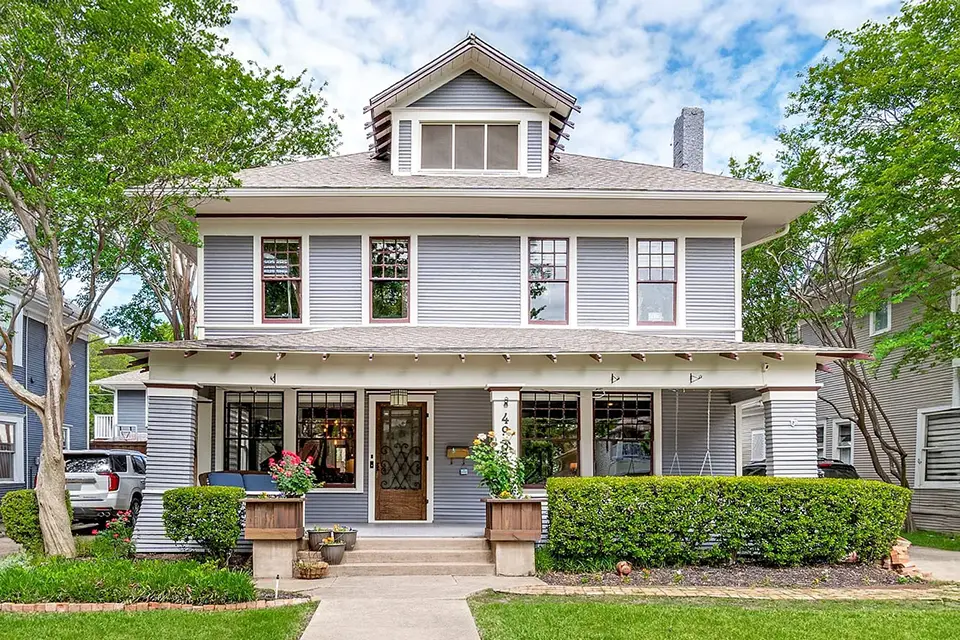
Front view of house filling entire frame, called the 'hero' shot.
Feature view of backyard pool taken at dusk.
Tips per Specific Room
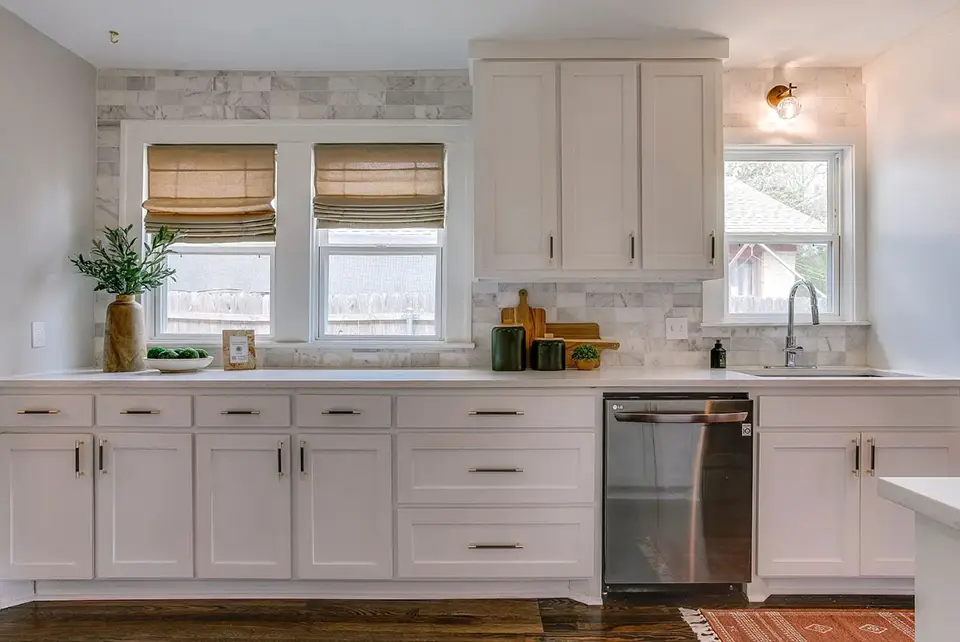
5.1 Kitchen
Preparation: Clean and Declutter
A spotless, minimalist kitchen is essential for appealing real estate photos. Buyers want to imagine their own items in the space, not someone else’s clutter.
- Clean thoroughly: Wipe down countertops, the island, sink, and backsplash.
- Remove small appliances (within reason): Clear away toasters, blenders, etc. Microwave and coffee maker can usually stay if they look neat and modern.
- Clear personal items: Remove magnets, calendars, photos, papers, and bulletin boards from the refrigerator and walls.
- Straighten fixtures: Align the faucet and any other visible hardware.
- Remove soft goods and pet items: Take away towels, oven mitts, floor mats, and pet bowls.
- No garbage can: Always remove the trash can and any visible garbage before shooting.
Photography Tips
- Set your camera height level with the bottom of the upper cabinets (Typically at 4.5ft high). Low angles are good for kitchens. However, the underside of upper cabinets is unflattering. This height will create the best possible images.
- Avoid angles that highlight the side of cabinets. All compositions should include more cabinet face than side.
- Never shoot from directly over the top of counters or islands. Instead, position yourself so you clearly capture the front edge or leading edge of the countertops and islands for proper depth and context.
Following these steps will help your kitchen images look clean, spacious, and highly marketable for real estate listings.
Clean sink area, remove items from fridge.
Typical corner angle including corner edge of island.
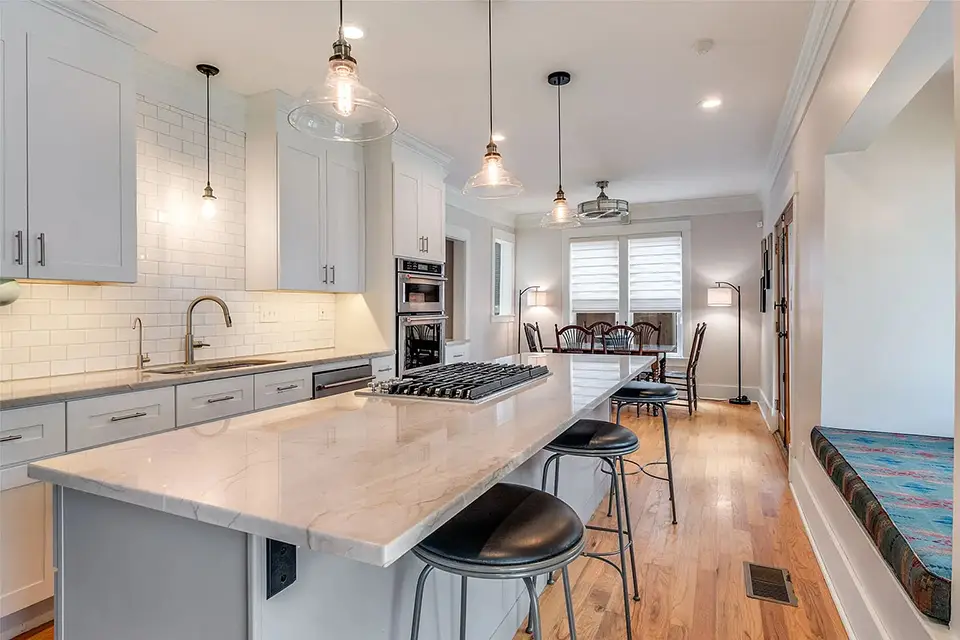
Level with bottom of cabinets, including front corner of island.
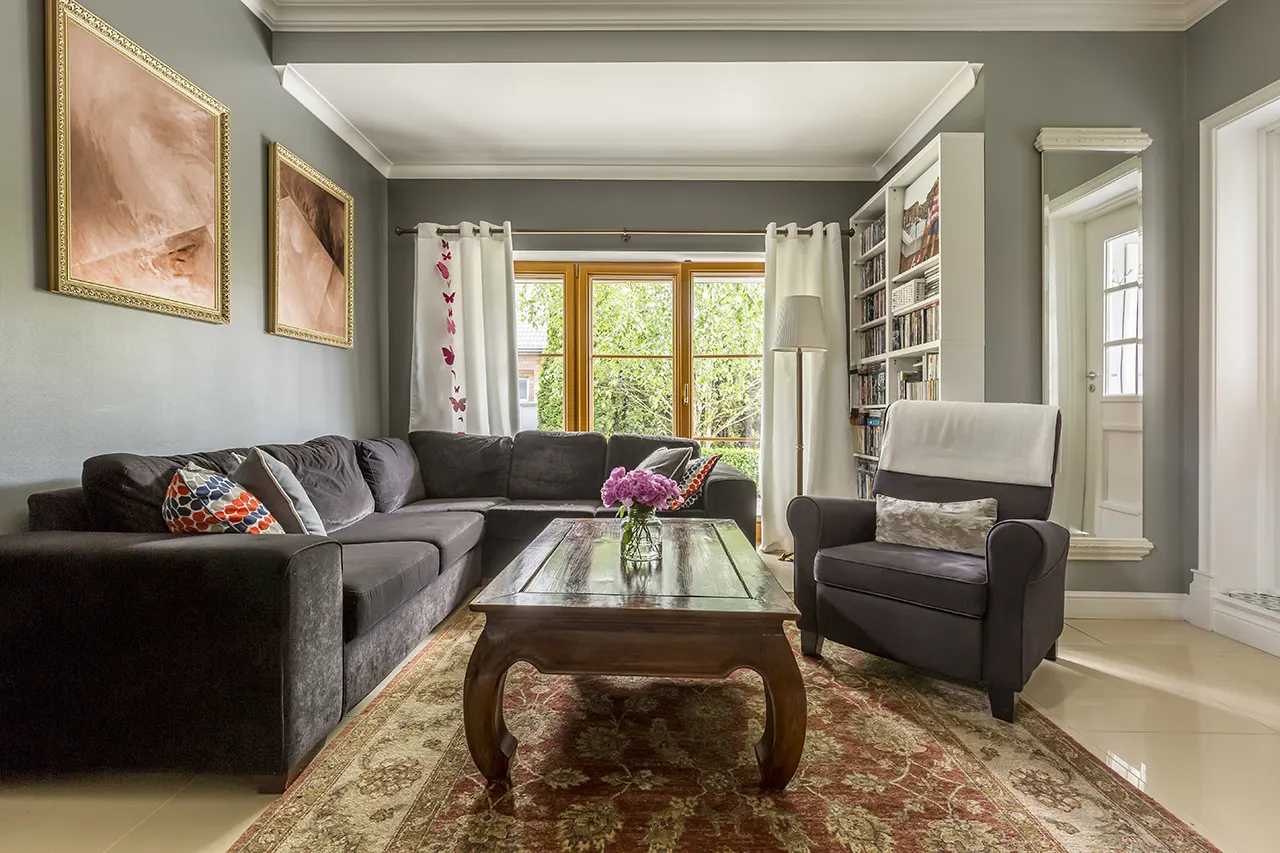
5.2 Family Room
Preparation: Clean and Declutter
A clean, inviting family room helps buyers envision themselves relaxing and entertaining in the space. Remove personal touches and create an open, airy feel.
- Remove personal items: Take down family photos, kids’ toys, mail, magazines, and religious items.
- Clear surfaces: Keep coffee tables and side tables minimal — one or two decorative items (such as a plant, book, or decorative bowl) is ideal.
- Fluff and arrange: Fluff pillows, straighten furniture, and arrange seating to create open pathways and natural conversation areas.
- Edit for space: Remove excess furniture if the room feels crowded or cramped.
- Open interior doors: This shows flow and connection to adjacent rooms.
Photography Tips
- Capture corner views that show the most of the room and take advantage of multiple windows for bright, airy shots.
- Take a clean straight-on shot of the fireplace when present — this is often a key selling feature.
- Avoid any angle that highlights the back side of a couch or lounge chair.
Following these guidelines will make your family room images feel spacious, welcoming, and ready for buyers or renters to move in.
Aim in to visiting area while maximizing windows.
Camera aiming into seating area while including windows.
Straight-on window view of family room.
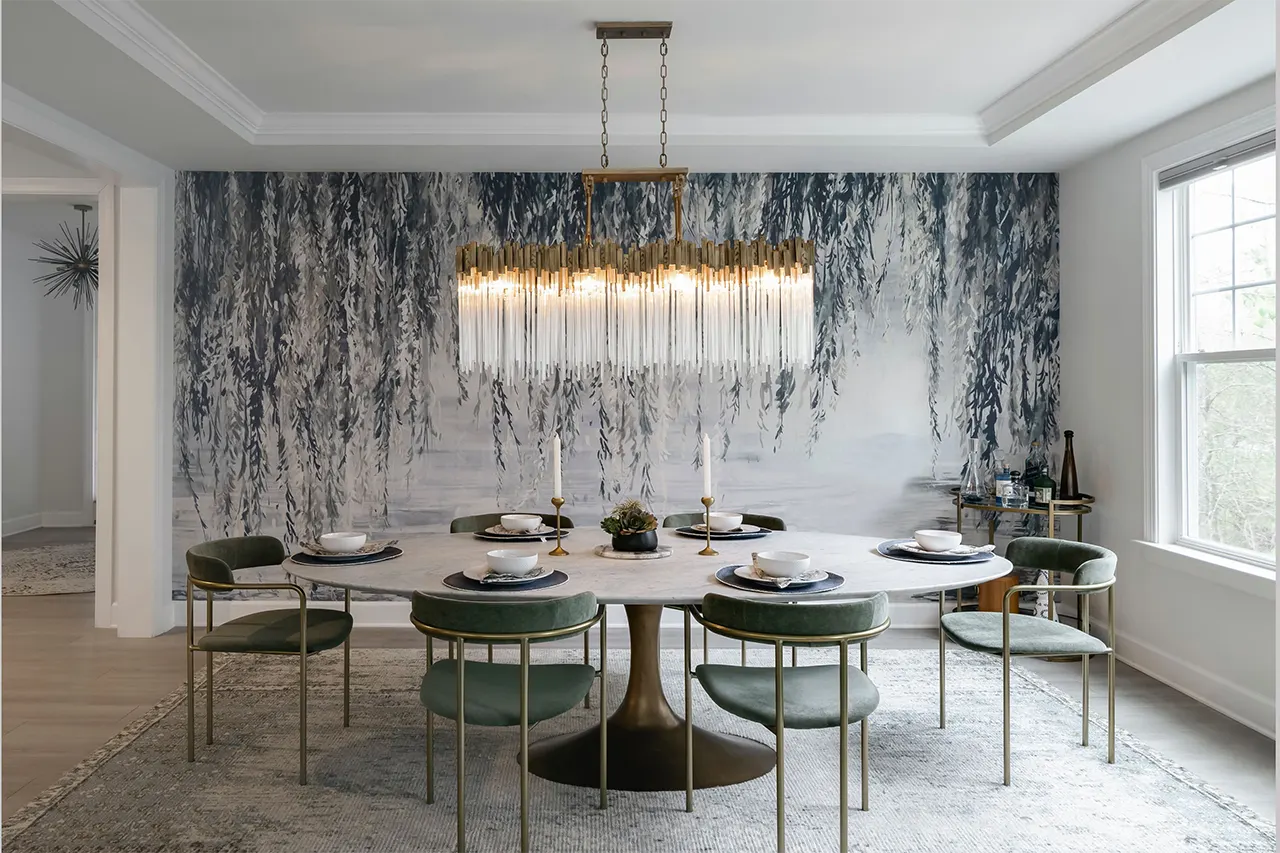
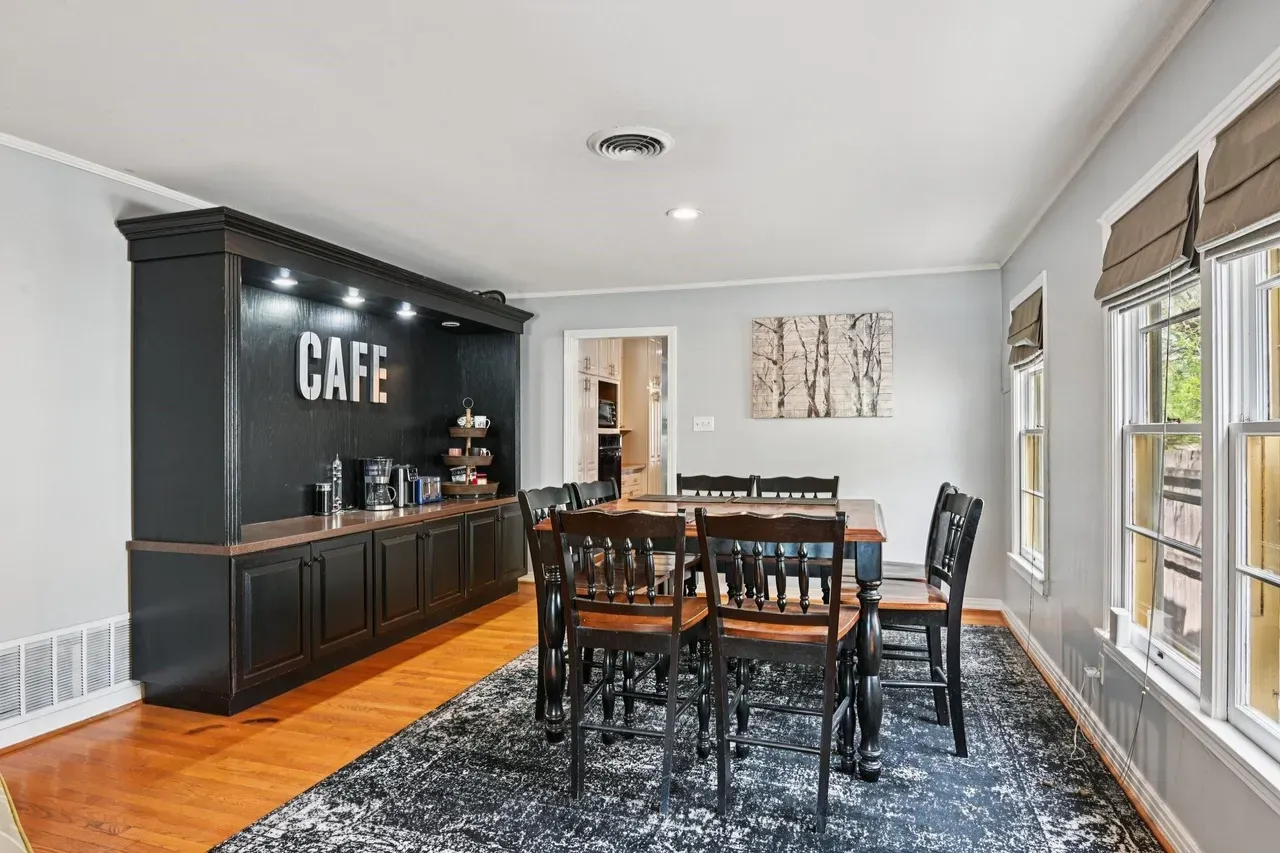
5.3 Dining Area
Preparation: Clean and Declutter
The dining room should feel elegant, spacious, and ready for entertaining. Keep staging minimal and symmetrical.
- Remove personal items: Clear excess decor and any clutter.
- Position the table: Center it in the room or directly under a light fixture if needed. Ensure there is open walking space all around the table.
- Remove extra furniture: Take out any small pieces that make the room feel crowded.
- Minimal table staging: Use a simple, elegant centerpiece such as a vase or fresh flowers.
- Arrange symmetrically: Tuck in all chairs evenly spaced around the table.
Photography Tips
- Open all curtains and blinds to maximize natural light.
- Turn on all interior lights for a bright, welcoming feel.
- Capture available window views, using corner angles whenever possible.
- Take straight-on shots from the long side of the table — avoid straight-on the short end.
- Show how the dining area connects to other rooms to highlight flow and functionality.
These steps will help your dining room photos look spacious, inviting, and highly appealing to renters or buyers.
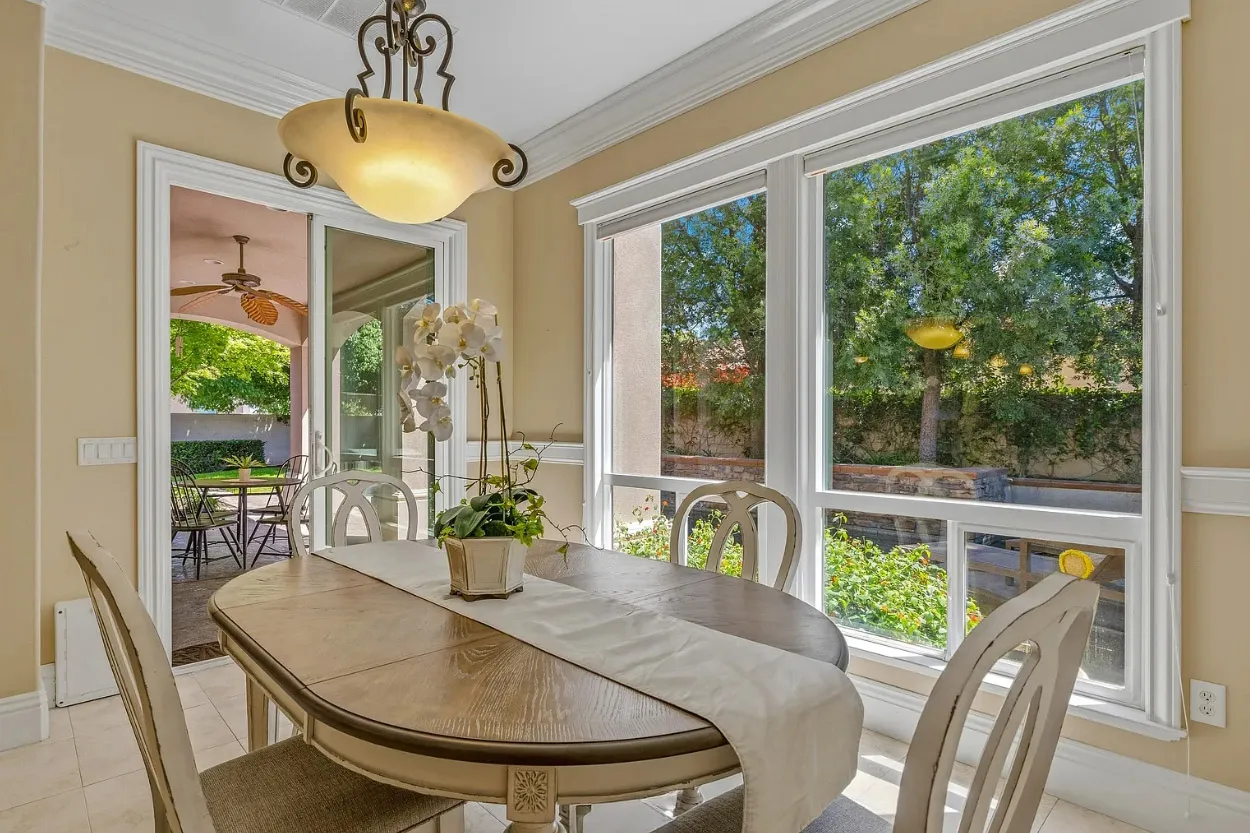
Dining table featuring window views.
Long side of table, featuring windows and buffet.

Small dining area, feature windows.
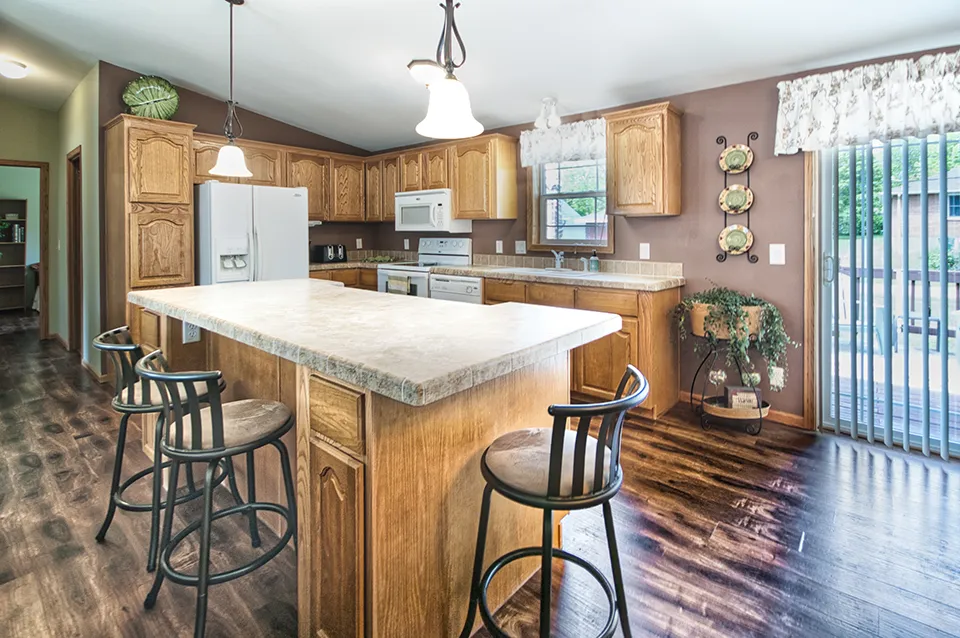
5.4 Open Floor Plan
Preparation: Clean and Declutter
Open floor plans sell lifestyle and flow. Keep the space clean, minimal, and thoughtfully arranged so buyers can easily see how the areas connect.
- Remove personal items: Clear away excess decor, toys, mail, and any other movable clutter.
- Minimal surfaces: Keep countertops, tables, and shelves very light — less is more.
- Define zones lightly: Arrange furniture to clearly suggest conversation areas, dining setups, and walkways.
- Pull furniture away from walls: Slightly move sofas and chairs outward to open up sightlines and create breathing room.
- Create strong flow: Open all interior doors and passageways. Stage the space so the eye travels naturally from kitchen to living area to dining without obstruction.
Photography Tips
- Shoot from far corners or near doorways for the best overall perspective.
- Capture wide establishing shots that show the full flow (e.g., one image of kitchen + living, another of living + dining).
- Use leading lines such as countertops, rugs, or flooring patterns to naturally guide the viewer’s eye through the space.
- After getting strong open-area images, then focus on each individual zone (kitchen, dining area, family room, foyer, etc.).
These techniques will highlight the spaciousness and versatility of the open floor plan, making it one of the most attractive features in your listing.

View from kitchen looking out to open floor plan.

Target specific kitchen area of open floor plan.

Family room fireplace feature - back of couch okay due to table.
5.5 Bedroom
Preparation: Clean and Declutter
Bedrooms should feel calm, spacious, and neutral so buyers or renters can picture themselves resting there. Personal items need to be removed.
- Remove all personal items: Clear family photos, medications, clothing, toys, books, and religious objects.
- Clear nightstands: Keep surfaces minimal — only 1–2 items (such as a lamp, book, or small plant).
- Make the bed perfectly: Use crisp, neutral-colored linens (white, beige, or soft gray). Fluff all pillows.
- Limit pillows and accents: Use 2–4 pillows per side with very few decorative pillows or throws.
Photography Tips
- Shoot from the doorway or a far corner to capture as much of the room as possible.
- Show the full bed without cropping it and keep the bed as the main focal point.
- Open closet doors slightly (only if they look neat and organized).
- Include the en-suite bathroom doorway to show flow and additional space.
- Capture at least one shot that includes the entry door to help buyers understand the room’s layout and circulation.
Following these steps will create serene, inviting bedroom images that appeal to a wide range of buyers or renters.
Straight-on wall view, always featuring bed.

Shades open, lights on, feature bed and windows.

Always take one angle showing location of ensuite.
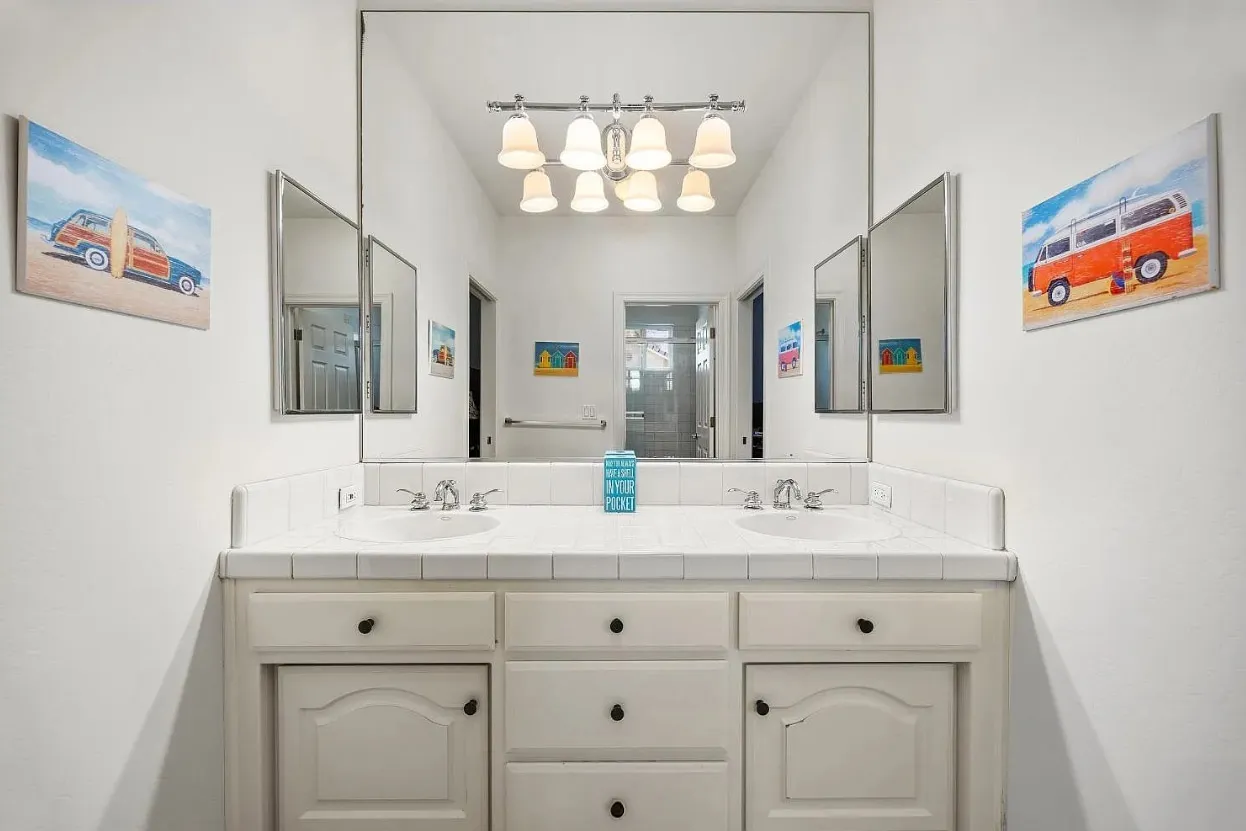
5.6 Bathroom|Laundry
Preparation: Clean and Declutter
Bathrooms and laundry rooms must appear spotless and hotel-like. Buyers notice every detail in these functional spaces.
- Clear all surfaces: Remove toothbrushes, toothpaste, makeup, hair products, medications, razors, and anything else from sinks, counters, and tubs.
- Remove functional items: Take out garbage baskets, toilet brushes, plungers, and any other loose items.
- Open shower curtains or glass doors to show the shower/tub area clearly. If the tub is not flattering - another option is to only open one end. Always the side with the shower head with the curtain/door opened enough to see it in the shot.
- Lower the toilet lid. If the paper roll is visible replace it with a full and neat roll.
Photography Tips
- Always shoot in landscape (horizontal) orientation. In small rooms there will be a desire to turn your phone into portrait orientation. Don't do it!.
- Best angles are usually from the doorway (step back as far as possible) or a corner to capture the vanity and shower/tub in one frame.
- Take clean straight-on detail shots of the vanity and tub.
- Use the split-view technique: Capture part of the bathroom on one side and the bedroom or hallway on the other to show flow.
- Take advantage of mirrors — carefully angle your shot so the reflection reveals more of the room. Try to keep yourself out of the photo - but remember in post-processing your image can be removed.
These tips will help your bathroom and laundry images look clean, bright, and much more spacious.

Never use portrait orientation! Less of floor and ceiling are okay. Stay in landscape mode.
Split view technique featuring vanity while including bed, and window.
Small bathroom using mirror to increase view.
5.7 Foyer|Entrance
Preparation: Clean and Declutter
The foyer or entrance sets the first impression. Keep it clean, open, and welcoming so buyers immediately feel at home.
- Remove all personal items: Clear shoes, coats, jackets, backpacks, umbrellas, pet items, and mail.
- Hide belongings: Store everything out of sight in closets or other storage areas.
- Straighten the door mat and ensure the area looks tidy.
- Only if the coat closet is neat and organized, open the door slightly to showcase available storage.
- Move vehicles if they are visible through windows or the front door in the background.
Photography Tips
- Never shoot just the front door alone — always show context.
- Step back to capture the full entrance area, including the hallway, staircase, console table, or coat area.
- Include open sightlines into the living area or other main spaces.
- Make sure the front door is visible in at least one interior shot to show the transition from outside to inside.
- Consider a shot from just inside the open door, framing the view as you enter or leave the house.
A well-presented foyer helps create a strong, positive first impression in your real estate photos.
Include window and staircase when taking front door photo.
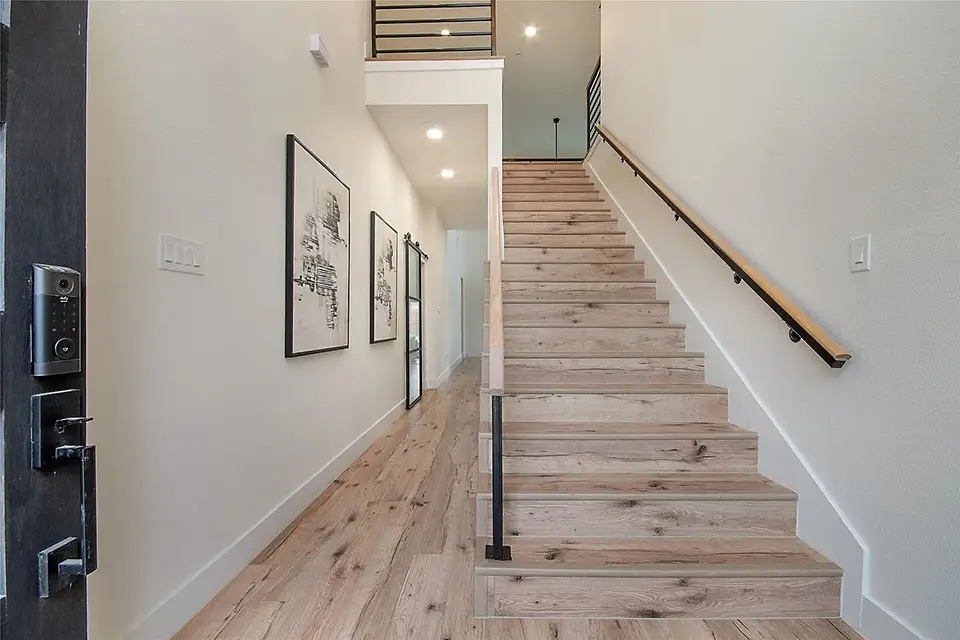
View from front door including staircase and hallway.
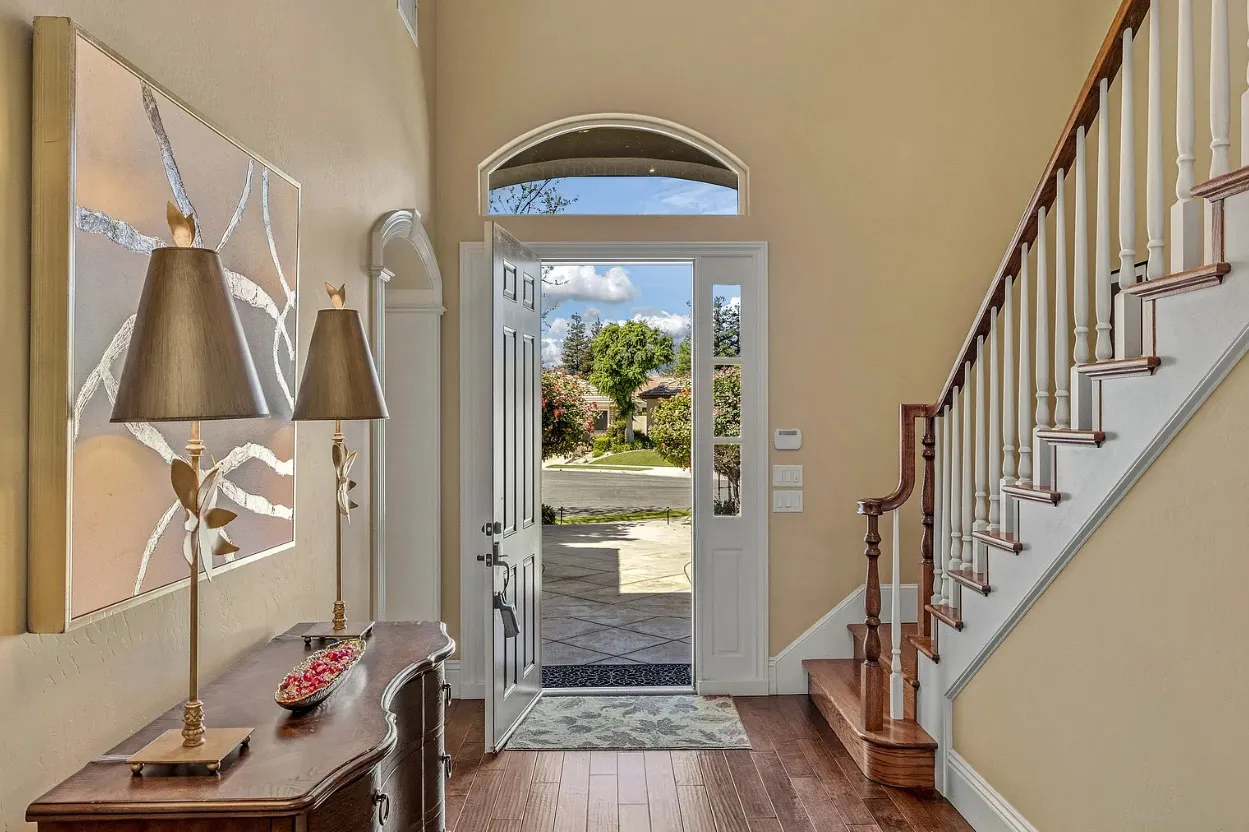
View looking out front door - no vehicles in driveway.
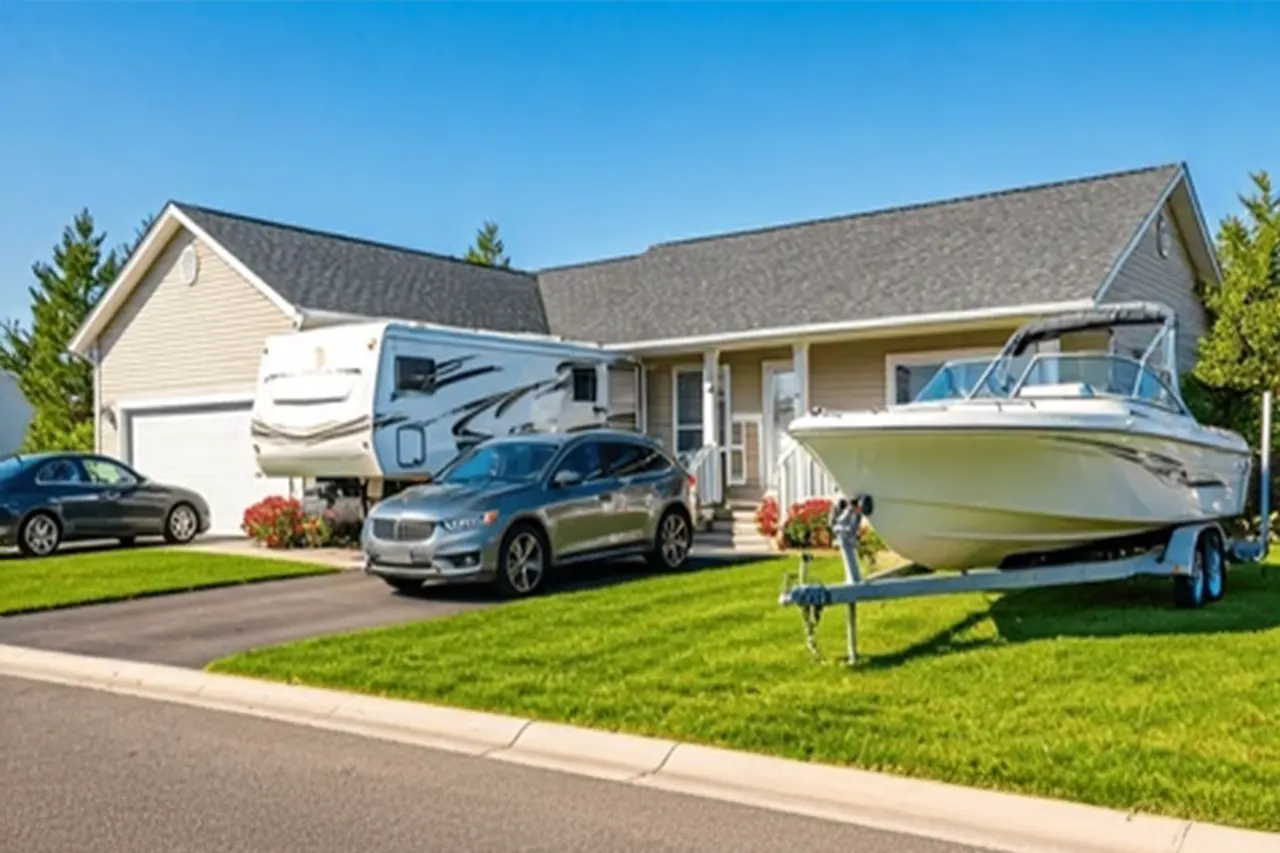
5.8 Outdoor
Preparation: Clean and Declutter
Strong curb appeal is critical for real estate photography. A clean, well-maintained exterior makes the best first impression.
- Clear vehicles and clutter: Remove all cars, boats, trailers, and other items from the driveway and street when possible.
- Close garage doors and move garbage cans out of view.
- Time your shoot wisely: Photograph after the lawn has been freshly mowed and plants/bushes are neatly manicured.
- Turn on all exterior lights.
- Clean outdoor areas: Sweep decks, patios, and straighten outdoor furniture. Clean the swimming pool if present.
- Camera setting: Switch your smartphone camera to 1x zoom mode (ultra-wide is not recommended for outdoor shots).
Photography Tips
- Avoid shooting when heavy shadows fall across the front of the house. Overcast days work well (blue sky can be added in editing).
- Capture the full view of the house from each corner, especially the two front corners.
- Always take the classic "Hero" shot: a straight-on front view with the entire structure in the frame.
- Get a closer shot focused on the front entrance area.
- Experiment with different camera heights — from waist height up to arm’s reach — and choose the most flattering later.
- Take plenty of photos from various angles and select the best ones afterward.
Dusk / Twilight Photos
If you want dramatic dusk shots, shoot during the “blue hour” — the short 10–20 minute window right after sunset when the sky is still a deep blue. The timing window is very small, so be prepared. For the best effect make certain all lights are on - inside and out.
These outdoor techniques will showcase the property’s exterior at its best and greatly improve listing appeal.
If possible, avoid heavy shadows on front side of house.
Feature 'hero' shot with front of house taking almost entire frame.
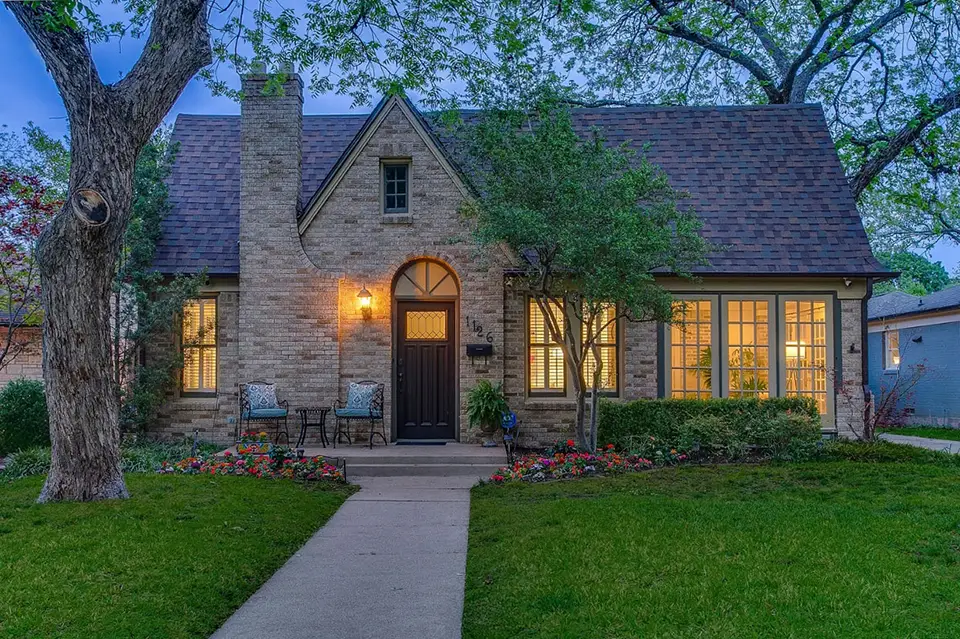
If attempting dusk shot, turn on all interior lights.